Tomato Sauce with Onion and Butter
You will find yourself eating this sauce straight out of the pot!
My oldest son gave me the quintessential classic Italian cookbook for Christmas. It is entitled: Essentials of Classic Italian Cooking and is written by Marcella Hazan. This book is to Italian cooking what Mastering the Art of French Cooking by Julia Child is to French cooking. Now I'm not a big pasta maker, or eater, but I am looking forward to making some delicious dishes and hopefully learning some new techniques and the history behind them. As I am writing this I am gazing at a diagram in this cookbook demonstrating how to clean and prepare a squid for cooking. I probably won't be using this diagram, but it's good to know where to find it if I ever need it.
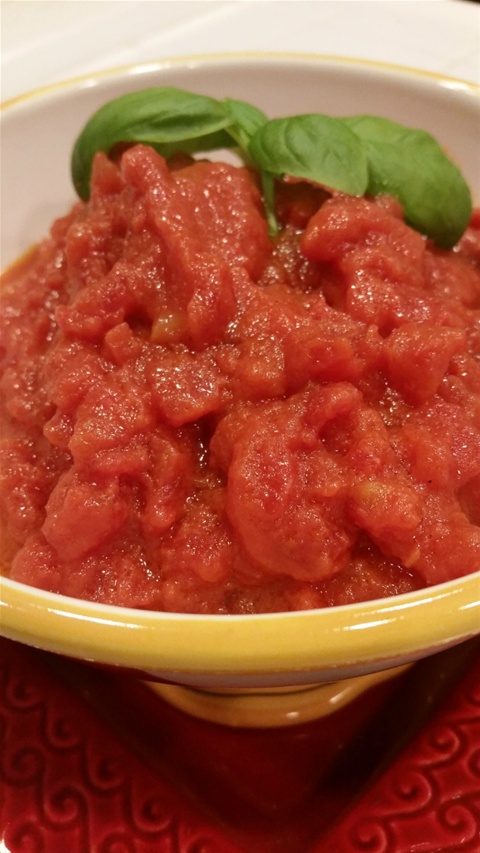
However, I will often make one of the most simple and delicious recipes in this book. My son recommended it so it was the first one I tried. It is tomato sauce with onion and butter. I'm not really a big fan of red sauce. When I eat pasta I'm all about the cream sauce or browned butter and mizithra cheese. There is something about this sauce that makes you just want to eat it... even without pasta. I found myself putting it on brown rice, cold on a salad, you get the picture. I just envisioned it on bruschetta... OMG. I didn't even use fresh tomatoes. I used two cans of diced tomatoes and half a red onion. I also cut-up the onion and mixed it with the sauce when it was done.
In her introduction to pasta sauces, Marcella Hazan gives a few pointers on creating delicious red sauce. She says that pasta sauces may cook slowly or rapidly and may take 4 minutes or 4 hours, but they should be cooked by evaporation, which concentrates the flavor. That is why tomato sauce should never be cooked in a covereed pan. She also suggests that the sauce should be to taste before it is tossed with the pasta. If it needs more salt then salt it! Also, the cooking time depends on how much sauce you make and the kind of pot you are using. You will know when it is ready by the way it tastes and its density.
Tomato Sauce with Onion and Butter
Marcella Hazan
Ingredients:
2 pounds fresh, ripe tomatoes, blanched, skinned, and cut into coarse pieces or 2 cups canned plum tomatoes, cut up, with their juice.
5 tablespoons butter
1 medium onion, peeled and cut in half
Salt
1 to 1 1/2 pounds pasta
Freshly grated parmigiano-reggiano cheese for the table
Directions
Put either the prepared fresh tomatoes or the canned in a saucepan, add the butter, onion, and salt, and cook uncovered at a very slow, but steady simmer for 45 minutes, or until the fat floats free from the tomato. Stir from time to time, mashing any large piece of tomato in the pan with the back of a wooden spoon. Taste and correct for salt. Discard the onion before tossing the sauce with pasta.
-
You will want to make this cauliflower pizza crust!
See below for the recipe.
-
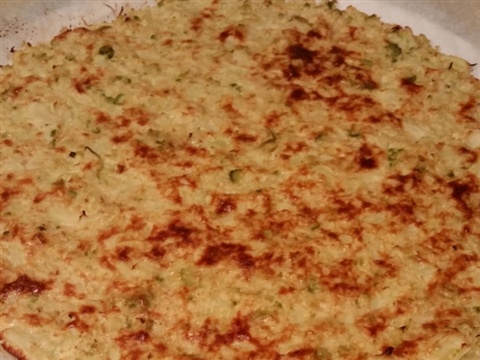
The crust after baking. Ready for your healthy toppings!
Heart Healthy Cauliflower Pizza

This recipe is really worth making for the ones you love!
I love pizza - always have. For a special time when we were little my mom and dad would take my sister and me to Pietro's Pizza on the river in Eugene. At that time it was kind of like going to Knott's Berry Farm with funny little themed-houses with silly mirrors and scenes to look at. The actual parlor had a red and white billboard marquee with lots of lights, and the inside was all red velvet and gold. There was also live organ music. I'm sure the pizza was great, but honestly I don't remember much about it except for the way it smelled, which always made my mouth water. During high school this Pietro's was the place to hang after the football games... but that's another story all together.
Then there was Woodstock's in Corvallis. I was lucky to not gain the freshman 25 when in college, although I have no idea why not. My claim to fame was that I could eat a whole Woodstock's small pizza by myself, with a chaser of a one pound bag of peanut M&M's. The whole wheat crust from Woodstock's was legendary. Think the best whole wheat artisan bread, warm from the oven, with delicious sauce, cheese and toppings. Of course I later discovered Chicago-style pizza, stuffed-crust Pizza Hut, (I don't discriminate) and several years of living down the street from the world headquarters of Little Ceaser's in Ann Arbor, Michigan. For half a year, while on the Adkin's Diet, I just ate the cheese and topping off of pizza and left the crust.
Lately, I stay away from pizza with crust all together. So when I saw the recipe for cauliflower pizza on Pinterest a year or so ago, along with most of the world, I was very excited. I have made it several times and have totally perfected the cauliflower crust. The key to this crust is not to make it too wet. One must also remember that the crust is made from cauliflower, and that it is necessary to eat it with a fork.
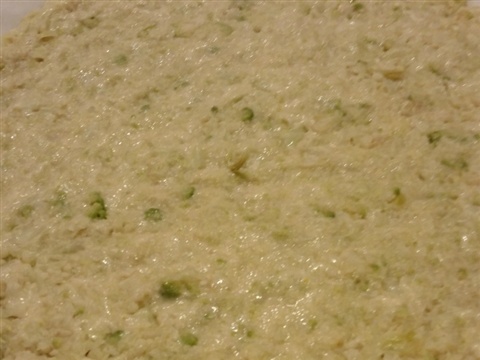
To make this delish bread-free delight, you first need to cook one cauliflower head. I usually just put it in a glass bowl in the microwave with a smidge of water, cover it with plastic wrap or a plate, and set the microwave to 10 minutes. You want the cauliflower soft enough to rice it or simpley mash it with a potato masher.
After you have mashed it let it cool. After it has cooled, add salt and pepper or other herbs to taste, one egg, and two cups of shreeded mozzerella cheese. Mix this up and then press it out onto a pizza or baking pan covered with parchment. Bake in the oven at 400 F until the top is nice and brown.
Top with whatever you wish and put back in the 400 degree oven until toppings are melted or hot. You could easily get away without putting more cheese on the crust. It holds-up just fine to sauce and toppings. The pizza pictured was topped with part-skim mozzerella, red sauce, turkey pepperoni, red bell peppers, black olives, and fresh basil after baking. Have fun making your own cauliflower pizza creations!
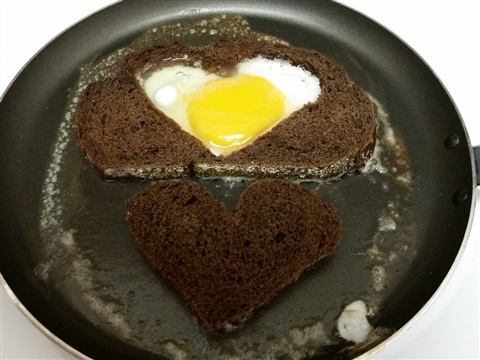
Heart in your hands
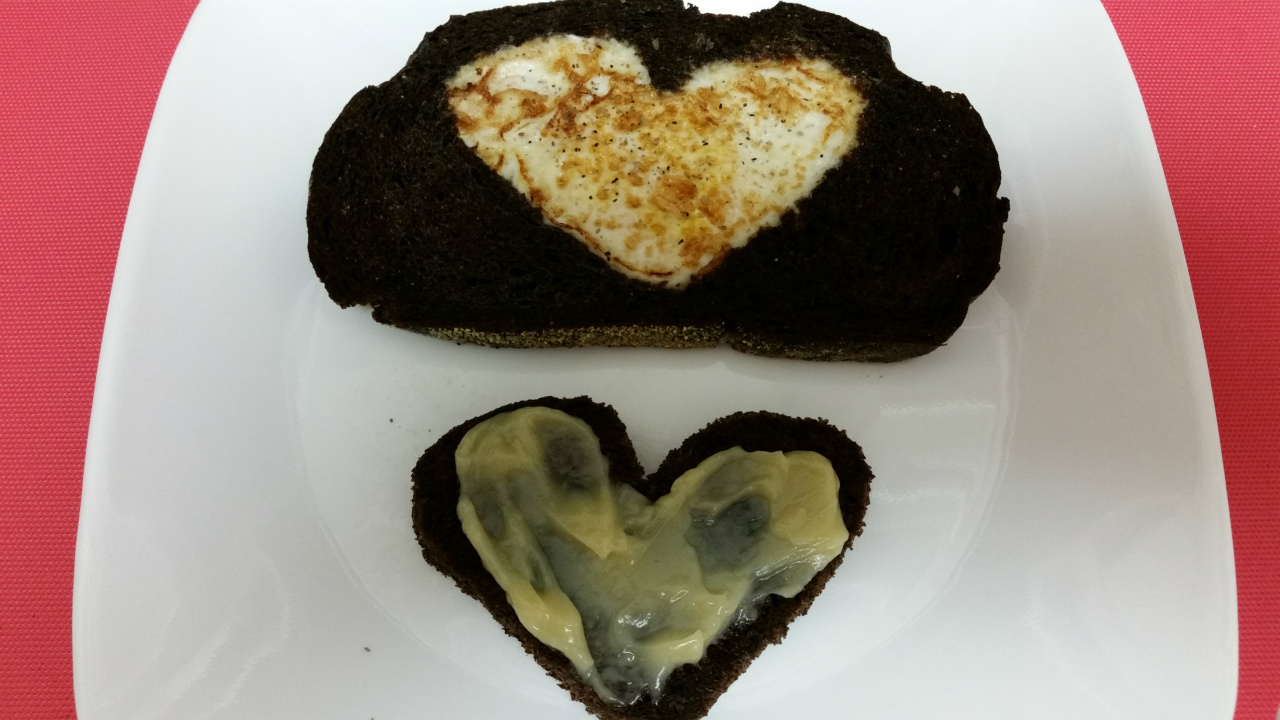
Egg in toast with pumpernickel bread and lemon curd on the small heart toast
Egg In Toast
I married a man who had grown up with a mother who knew how to cook. I mean really cook. Her mother had been a cook on a ranch, and when I became a member of the family I quickly learned about butter, biscuits and gravy, and how to cook a "real" ham and homemade mac and cheese. One of the small delights that my husband brought to our new family from his childhood was the proverbial "egg in toast." It became a standard for our own kids. So I was happy when browsing on Pinterest for valentine recipes to find this adaptation of our homey dish.
After making this with sourdough bread, I quickly realized that white egg on white bread doesn't show up so well. Instead, I tried pumpernickel, and it turned out beautifully. Of course, if you have finicky eaters, this might not fly, but I encourage you to give it a try. I'm not going to write directions for this recipe because I know that you can figure it out on your own. Just be sure to use butter in the pan because it just makes it taste so darn good! Oh, and one more thing. You don't need a cookie cutter to make the heart - just use a knife.

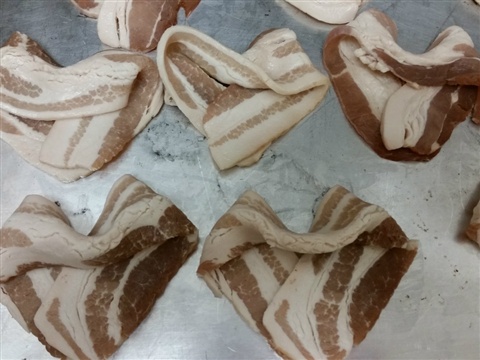
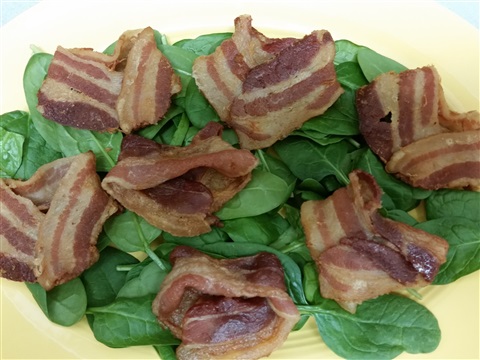
Don't forget the bacon
Bacon Hearts
This was another Pinterest find. To fashion these hearts I actually bought thick-cut smoked bacon from the butcher, thinking that it would retain its shape better than the thin, packaged kind.
I lined a lipped baking sheet with parchment, preheated the oven to 400F, and formed the hearts on the parchment. I found that it worked best when I had the ends of the bacon meet at the bottom tip. If I were to make these again, and I will, I would make the top indentation of the heart more pronounced since they tend to lose their shape a bit when cooking. I cooked mine for 20 minutes, but you need to check them and it may take longer depending on your oven.
-
-
-
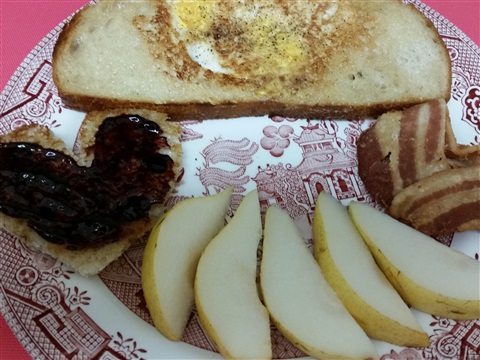
Sourdough egg in toast with bacon heart
What is red and velvety and good to eat?
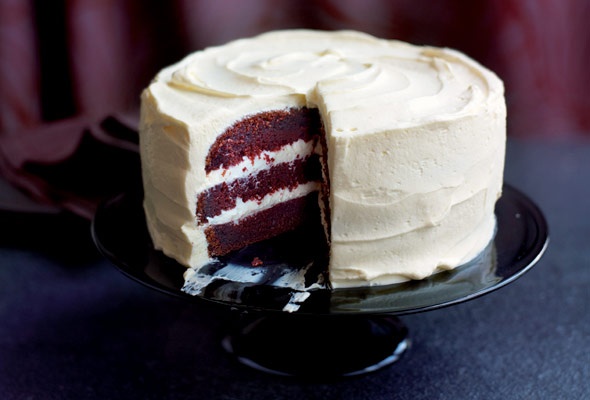
Three-layer Red Velvet Cake
Photo and history from leitesculinaria.com
Red Velvet Cake with Buttercream Frosting
My mom loved to make desserts. Whatever "new fangled" sweet was popular, she tried baking it. I'm not talking about Julie Child cuisine. I specifically remember when peanut butter frosting was all the rage, when Chinese crunchy noodles dipped in white chocolate bark became big, and when bundt cake mixes came on the scene. So, when Red Velvet Cake started circulating, she was on it!
Ironically, Red Velvet is a vintage recipe. Many sources report that it originated in the 1920's and was served at the restaurant in New York's Waldort-Astoria Hotel. Besides the red food coloring involved in making it from scratch, it has the signature ingredients of baking soda mixed with vinegar to add lightness and buttermilk for a slightly sour/sweet taste. The traditional buttercream frosting puts the whole thing over the top!
I have had many Red Velvet cupcakes from upscale bakeries and I find most of them to be a bit greasy or dry. There are recipes for Red Velvet cupcakes using German Chocolate cake mixes which are easy to find on the internet. Below you will find my mom's version of the cake. It could be used for cupcakes but if you are going to go to the trouble of making it from scratch, I recommend you commit and just make it into a beautiful cake!
Red Velvet Cake
Preheat oven to 350F
Ingredients:
1 (1 oz) bottle red food coloring
1/2 cup shortening
1 1/2 cup sugar
2 eggs
2 TBSP Cocoa powder
1 TBSP salt
1 TBSP vanilla
1 cup buttermilk
2 1/2 cups cake flour
1 TBSP vinegar
1 1/2 teaspoon baking soda
Instructions:
Cream shortening and sugar. Add eggs and beat well. Make a paste of the cocoa and red food coloring. Add this to the creamed mixture. Mix salt, vanilla and buttermilk. Add flour alternately with buttermilk to the creamed mixture and mix. Mix soda and vinegar together and fold into batter. Do not beat or stir because this will cause the air bubbles to exit.
Bake in two 9" round cake pans, greased and floured.
Bake at 350F for 30 minutes or until a toothpick comes out clean in the middle.
Buttercream Frosting
Ingredients:
5 TBSP flour
1 cup milk
1 cup granulated sugar
1 cup butter, softened
1 teaspoon vanilla
Directions:
Cook the flour and milk in a saucepan over low hear, stirring constantly so as not to burn. When it becomes thick, remove from heat and cool thoroughly. Cream sugar, butter and vanilla. Add to the cooled flour and milk mix. Beat until spreading consistency and until the granulated sugar is dissolved.
-
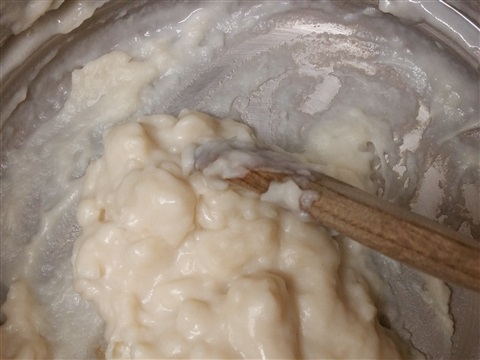
Cooked flour and milk mixture
-
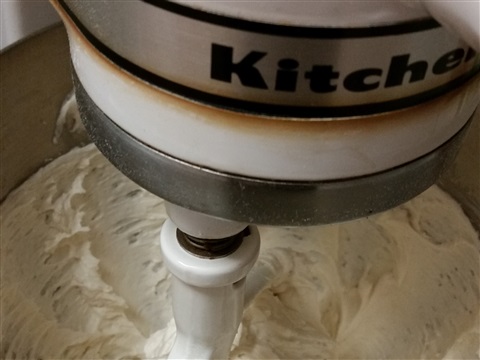
This buttercream frosting really needs to be whipped so that the granulated sugar becomes dissolved.
But wait.... there's more!
Try a Red Velvet cake mix for these brownies.
Red Velvet Brownies - Pioneer Woman style!
I was watching "The Pioneer Woman," Ree Drummond, make some crazy brownies for her children the other day on The Food Network. She used a German Chocolate cake mix and evaporated mild to make a brownie dough that was pliable and that she patted into a pan and filled with various chocolate candy. I have included the link to that recipe below.
thepioneerwoman.com/cooking/2014/05/crazy-brownies/
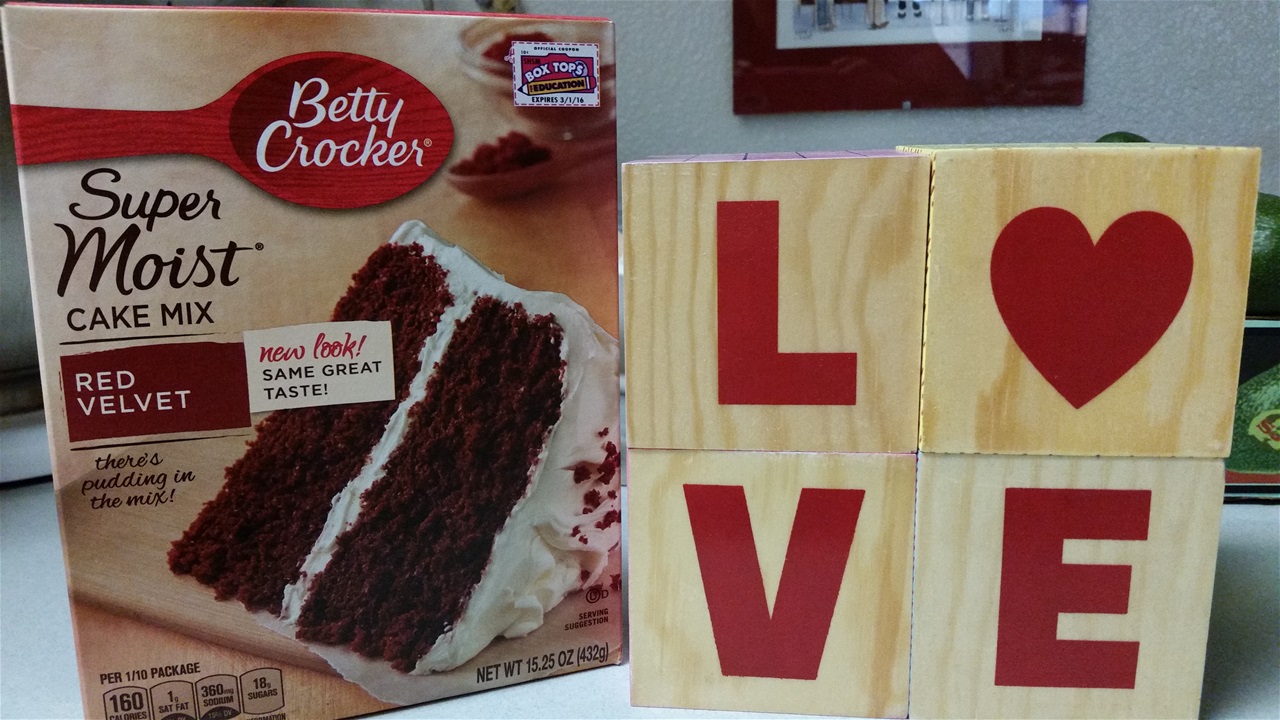
I, on the other hand, wanted to make some Red Velvet brownies using the Red Velvet cake mix I had purchased. Instead of just making the mix, I decided to adapt Ree's recipe. Below you will find what I did and see pictures of how it turned out. The brownies cooked very evenly with no darkening along the sides like I usually get, but they fell flat after they had cooled and the outside rim of the brownies sloped into the middle. I cut this off, ate it, and still had a dozen plus 3/4 inch square brownies to frost with delicious buttercream frosting and top with a heart-shaped Dove chocolate!
Chewy Red Velvet Brownies
Preheat oven to 350FIngredients:
1 box Red Velvet cake mix
1/2 cup evaporated milk
1 stick melted butter
Directions:
Melt butter. Combine cake mix, butter and evaporated milk. Mix until no dry ingredients remain. Dough will be thick and sticky. Grease a square 9" baking pan. Pat dough evenly into pan. Bake until toothpick comes out clean, approx. 20 minutes. Remove from oven and cool in pan. Brownies will fall. When cool, cut into 3/4" squares and top each brownie with a dollop of buttercream frosting.
-
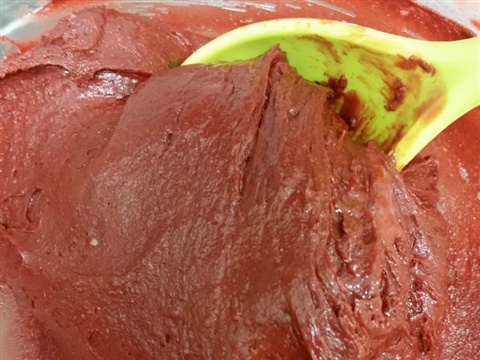
The mix is very thick and you pat it into a greased pan.
-
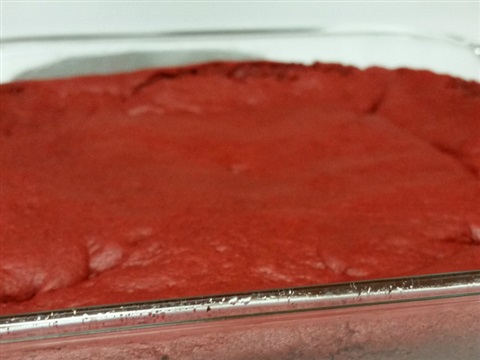
The brownies cook nicely but will fall when cooled - making them nice and chewy.
-
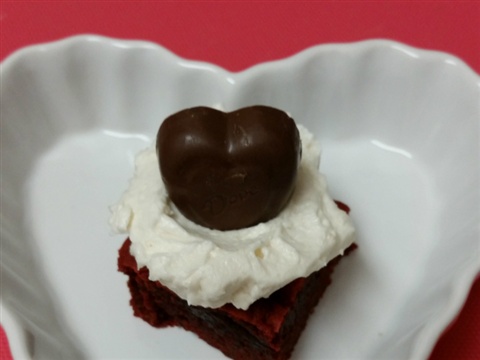
Topped with buttercream frosting and a Dove chocolate - you only really need just one!
A heart healthy finale
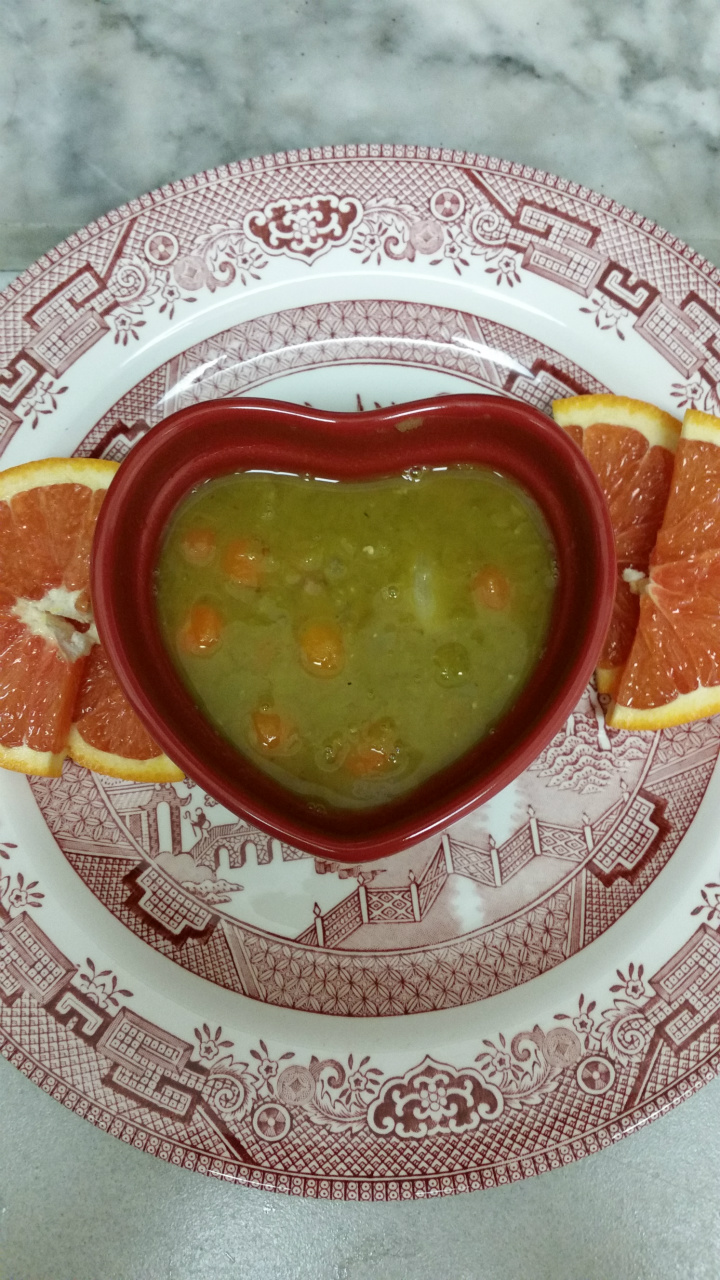
Split pea soup
Split Pea Soup
This is one of my family's favorite soups. My son actually asked his wife to make it for his birthday this year. It is straight out of the 2006 Weight Watchers Cookbook. It does contain Canadian bacon or ham. I prefer the taste of ham. If you really want to be healthy and not include the meat, try putting in a drop or two of liquid smoke! I also have added the tabasco and orange juice to the original recipe. Happy heart healthy eating!
Split Pea Soup
Ingredients:
2 teaspoons olive oil
1 onion, finely chopped
2 cups chopped carrots
1 clove garlic
1 cup dried green peas
4 cups low sodium chicken broth or vegetable broth
1/2 cup chopped Canadian bacon or ham, or 1/4 teaspoon liquid smoke to taste
1 teaspoon dried marjoram
3/4 teaspoon salt
1/8 teaspoon pepper
green tabasco to taste
juice of one orange
Directions:
In a medium pot over medium heat, heat oil and saute the onion, carrot, bacon or ham, and garlic until softened, about 5 minutes. Add the water and bring to a boil. Add peas, spices and tabasco. Reduce the heat and simmer, covered, until the peas are tender, stirring often, about 45 minutes. Add a splash of orange juice before serving.
This soup thickens upon standing, so add water to thin when reheating.
Serves 4
NancyEstrada
looks great. If I decide to cook I'm going to try these 😎
Jeannie
Shelby, no treats for you. I'm pretty sure they were mailed to me.
Lindsay
Remember the red leather journal with the embossed heart that you put in my Xmas stocking this year? We've been using it as a "dinner journal" where we record what we make each night! #kitschspiration
Leslie
We have split pea soup all the time and I'd never thought of adding Tobasco - great idea! Thanks Coco.
shelby
Coco I hope these treats are waiting for me!